Insulating a campervan is a critical step toward creating a cozy living space on wheels. We’ve tried many options and here’s our nuggets of info on how to insulate a van best of all.
It’s not just about adding comfort; proper insulation affects temperature regulation, moisture control, and even noise reduction.
Whether you’re tackling rigid boards, fiber insulation, or bubble wrap, the process can be messy and challenging, but the payoff in long-term efficiency and comfort is immense.
Let’s walk through the essential steps we took to insulate a campervan and transform it from a mere vehicle into a luxurious mobile abode.
With a van ready to be customized, you’re facing a project that can be as creative as it is technical. The key is to prioritize insulation because, if done incorrectly, it could lead to complications like mold or excessive heat loss.
While there are numerous methods and materials available, having done it before we’ll help you navigate through the options to achieve the best possible outcome for your van life adventures.
Understanding the Basics of Van Insulation
Understanding van insulation is vital for a comfortable camper van experience. Knowing which van insulation materials to use, such as sheep’s wool for its eco-friendly properties, or closed-cell foam for its excellent R-value, is crucial.
The right camper van insulation ensures your van withstands the elements, making every trip enjoyable.
The Significance of R-Value in Camper Van Insulation Materials
When insulating your van, the R-value of insulation materials is a measure you can’t afford to overlook. It represents the material’s resistance to heat flow, a higher R-value equating to better insulation.
Living space inside a van is precious, so you want materials that offer the best bang for your buck – effective insulation without breaking the bank or compromising your health.
The Role of Vapor Barriers in Moisture Management
In van life, moisture control is critical, and plastic vapor barriers can be a dividing topic. A vapor barrier can protect the van body from interior moisture, but it may also trap it, leading to potential issues.
It’s essential to create a barrier that works with your van’s existing moisture control systems, like ceiling fans, to keep the interior dry and healthy.
For those using fiberglass insulation in their vans, sealing it properly with a plastic sheet is crucial to protect against particulates.
Whether it’s a plastic vapor barrier or another method, the goal is to ensure that moisture is managed effectively to prevent damage to the van’s body and maintain a comfortable living environment.
Heat Transfer in Vans: Conduction, Convection and Radiation
Heat transfer in vans occurs through conduction, convection, and radiation, influencing the temperature on all sides of the van.
Understanding these processes is key to selecting the proper insulation and maintaining a comfortable interior climate. It’s not just about keeping warm or cool; it’s about achieving a stable environment that feels like home.
The Impact of Conduction on Van Insulation
Conduction is the process where heat moves through materials, making van insulation materials like closed-cell foam critical in preventing heat loss. When insulating a campervan, you must pay attention to door panels, nooks and crannies, walls and ceilings.
Thinsulate insulation and XPS rigid foam insulation are popular choices for their high R-value and ability to snugly fit into tight spaces. Insulation batts also play a role in combatting conduction.
They can be cut to fit the unique contours of your van, ensuring that every inch is covered. Proper installation is essential to minimize heat transfer and keep your van comfortable no matter where your travels take you.
How Radiation Affects Your Van’s Temperature
Radiation is the transfer of heat through electromagnetic waves, which can cause temperatures inside your van to rise, especially from sunlight.
To counteract this, reflective materials like foil-faced foam boards can be used to bounce back the sun’s rays, helping to maintain a cooler interior during hot days.
It’s essential to consider radiation when planning your van’s insulation, particularly if you travel in sunny climates.
Convection and Its Influence on Interior Climate
Convection involves the movement of heat through air or liquids. In a van, this can lead to warm air escaping in the winter or hot air circulating inside during summer.
Properly sealing gaps and using insulation that prevents air movement is crucial for managing convection and maintaining a stable interior temperature.
By understanding convection and its effects, you can better insulate your van to keep the interior climate comfortable. This means less reliance on heating and cooling systems, leading to a more energy-efficient van life experience.
Selecting the Right Insulation for Your Van
Selecting the right insulation for your van is a crucial decision that will affect your comfort and the vehicle’s energy efficiency.
From the various insulation materials available, you’ll want to choose those that provide the best fit for your van’s specific needs.
Whether you’re filling door panels, sealing nooks and crannies, or laying down XPS rigid foam insulation for flooring, each material offers unique benefits. Insulation batts are a versatile option for many van builders, offering the flexibility to cover large areas effectively.
As you navigate the choices, consider factors like R-value, moisture resistance, and ease of installation to ensure your van is well-equipped for your adventures on the road.
1. Havelock Wool – Optimal Insulation for Overall Comfort
When it comes to van insulation, Havelock Wool stands out for its natural and eco-friendly properties. Not only does it provide excellent sound dampening and moisture control, but it’s also breathable and sequesters carbon.
This insulation is easy to install, requiring minimal protective clothing and gear, and offers a balance between environmental responsibility and practical comfort.
The breathability of Havelock Wool allows it to manage moisture without losing its insulating properties. This feature is especially beneficial in a van, where space is limited, and air quality is paramount.
Choosing Havelock Wool can contribute to a healthier and more comfortable living environment as you embark on your van life journey.
2. 3M Thinsulate – Ideal for Walls and Ceilings
3M Thinsulate is a synthetic insulation well-suited for the walls and ceilings of your van. Its ability to fit into the smallest of spaces makes it a prime choice for those tricky areas in your vehicle.
While it may come at a higher price point, Thinsulate’s moisture control properties and breathability are worth considering for those looking for a premium insulating solution.
Thinsulate’s effectiveness in managing both temperature and moisture makes it a favored material among van lifers who prioritize comfort and a controlled climate. If you’re looking to invest in insulation that offers both high performance and longevity, 3M Thinsulate is a contender worth your consideration.
3. Polyisocyanurate (Polyiso) Foam Board – High R-Value Solution
Polyisocyanurate, or polyiso for short, is a rigid foam board insulation known for its impressive R-value, making it an excellent choice for the floor of the van.
Available at many hardware stores, polyiso is both affordable and easy to work with, often coming foil-faced to act as a radiant heat barrier. It’s a smart choice for those seeking bang for their buck without compromising on quality or effectiveness.
With its non-toxic properties and environmental advantages over other van insulation materials like XPS foam board, polyiso is ideal for van builders who prioritize sustainability alongside insulation performance.
Its combination of affordability, high R-value, and eco-friendliness makes polyiso a top pick for insulating your van.
4. Extruded Polystyrene (XPS) Foam Board – Sturdy and Reliable
Extruded Polystyrene (XPS) foam board is another reliable insulation choice, especially in cold weather. Its moisture impermeability and high compressive strength make it perfect for insulating the van’s floor, where it will encounter various stresses.
Recognized by its typically pink or blue color, XPS is found in big box hardware stores and offers an R-value that ensures your van stays warm when temperatures drop.
While creating air gaps can enhance its insulating properties, the inherent strength and reliability of XPS make it a mainstay in the van-building community. It’s a sturdy option that provides peace of mind, knowing that your van is well-protected against the elements.
5. Spray Foam – Airtight and Effective Insulator
Spray foam insulation is renowned for creating an airtight seal, making it an effective choice for van builders. Its high R-value per inch and ability to fill gaps and cracks make it a powerful insulator.
While professional spray foam kits can be costly and require careful application, cans of spray foam are fairly inexpensive. Spray foam cans can be found at most hardware stores, perfect for sealing those hard-to-reach areas.
Despite its higher upfront cost, the long-term benefits of spray foam – such as improved energy efficiency and structural integrity – make it a worthwhile investment for many van builders. It’s a solution that not only insulates but also enhances the overall build quality of your van.
6. Reflectix – Caution Advised for Radiant Barriers
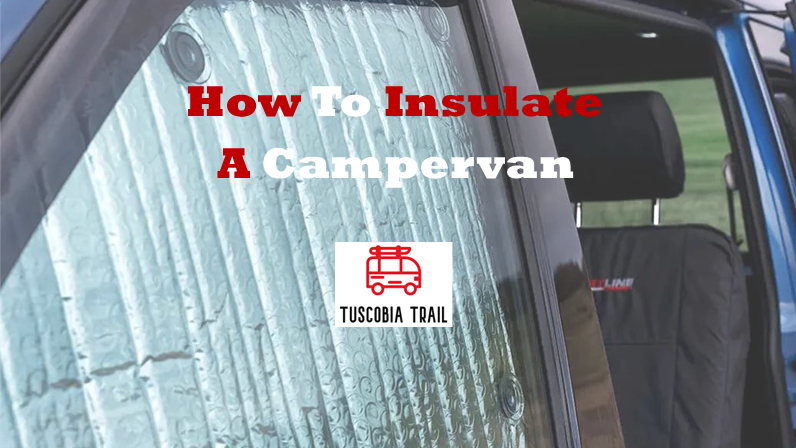
Reflectix is often seen in DIY van builds, touted for its ability to act as a radiant heat barrier. This thin bubble wrap with a reflective coating on each side can be particularly effective as window coverings, reflecting the sun’s rays and keeping your van cooler on sunny days.
It’s easily available at most big box hardware stores and is recommended for covering large cavities where it can reflect radiant heat effectively. However, caution is advised when using Reflectix as an insulator behind walls.
While it may seem like an attractive, easy-to-install option, it doesn’t provide a high R-value per inch, meaning there are more efficient materials for the space it occupies.
It’s essential to understand that Reflectix’s effectiveness is significantly reduced when not used as a proper radiant barrier, which requires an air gap to function correctly.
Steps to Insulate a Camper Van Interior
Insulating your van is a critical step towards a cozy retreat on wheels. The process begins with selecting the right materials that suit your travel needs and climate conditions.
Whether you opt for Havelock wool for its eco-friendly properties and moisture control or foam boards for their high R-value, ensuring you have the necessary tools and materials on hand is key.
You’ll need to plan out the insulation placement, considering the unique curves and crevices of your van. Once you’ve gathered your supplies, you’ll start by insulating the floor, then move on to the walls and ceiling, ensuring no space is left uncovered.
Special attention is needed for windows, as they can be a significant source of heat loss or gain. Throughout the process, it’s important to balance insulation with proper ventilation to maintain air quality and prevent condensation.
Preparing Your Van for Insulation
Before you start sticking any insulation to your van, it’s crucial to prepare the space. Begin by thoroughly cleaning the interior surfaces to ensure adhesives and insulation materials adhere properly.
Next, measure and plan where each insulation piece will go. Consider using sustainable materials like Havelock wool for its sound-dampening qualities and moisture control.
Ensure you have the right tools for cutting and securing your chosen insulation. Remove any fixtures that might get in the way and plan for electrical wiring or other systems that need to be integrated.
It’s a great time to think about where you might need furring strips for additional support or to create an air gap, which is necessary for some insulation types to perform optimally.
Insulating the Van Floor for a Solid Foundation
The van floor is where your insulation journey begins, laying down the groundwork for a comfortable living space.
Start by creating cardboard templates to ensure a precise fit for your pieces of foam or chosen insulation. This step will minimize waste and make the process smoother. Once cut to size, lay down a plywood subfloor over the insulation, which will serve as a sturdy base for your interior build.
Avoid laying Reflectix directly on the floor; instead, use it as an additional layer to reflect radiant heat when necessary. The main aim is to create a solid foundation that will keep you warm from the ground up.
Remember, a well-insulated floor makes a big difference in overall comfort, especially during chilly winter nights or on hot summer days.
Walls and Ceiling: Ensuring Complete Coverage
For the walls and ceiling, you’ll want to opt for insulation that not only fits snugly into the contours of your van but also offers high R-value for the cold weather you might encounter. One-inch polyiso foam board is a budget-friendly choice that’s readily available at hardware stores.
The foam boards are easy to cut and fit within the walls of the van, and they can be secured with adhesive or expanding foam, which also helps to seal any gaps. When dealing with the ceiling, make sure the foam boards are firmly in place to prevent sagging.
This layer of insulation will help maintain a comfortable temperature inside your van, whether you’re braving the freezing temperatures of winter or enjoying the summer heat. Proper installation ensures complete coverage, reducing heat loss and maximizing the efficiency of your heating or cooling systems.
Addressing the Windows: Balancing Light and Insulation
Windows are a critical aspect of van insulation, often overlooked. They can be the weakest link in retaining heat during winter nights. While you want to maintain the option for natural light, it’s important to find a balance that doesn’t compromise your van’s insulation.
Using removable window coverings can provide flexibility, allowing you to insulate the windows when needed and enjoy the view when desired. Consider the placement and size of windows when planning your insulation.
Larger windows may require more substantial covering to prevent heat loss, while smaller ones might get by with less. The goal is to achieve a comfortable living space without giving up the joys of sunlight and scenic vistas that make van life so appealing.
Tips for Insulating Windows Without Sacrificing Natural Light
To keep your van’s interior bright while also retaining heat, consider using window coverings that reflect radiant heat during the day. These coverings can be designed to fit snugly against the glass, maximizing the ability to reflect heat away.
At night, they work to keep heat from escaping, ensuring your van stays cozy. Consider adding a layer of bubble wrap for extra insulation without losing much visibility. For temperature control, install a vent fan to promote airflow and prevent condensation.
This will help maintain a steady temperature inside your van, keeping you comfortable year-round. The vent fan is especially useful for letting heat escape on sunny days and preventing cold air from seeping in during the night, making it a versatile addition to your insulation strategy.
Ventilation and Insulation: Achieving the Right Balance
Proper ventilation is just as important as insulation in creating a comfortable van environment. While insulation helps maintain the temperature inside your van, ventilation is key to preventing condensation and promoting air quality.
Striking the right balance between these two elements is crucial. Use materials that allow your van to breathe, like Havelock wool, which naturally regulates moisture and ensures a healthy interior atmosphere.
Consider installing roof vents or opening windows to facilitate cross-ventilation. This will help to manage humidity levels and prevent the buildup of stale air.
Active ventilation systems, such as vent fans, can also be a game-changer, especially in warm climates or when cooking inside your van. They help to exhaust warm, moist air and draw in fresh, cooler air, maintaining a pleasant living space.
The Importance of Air Circulation in an Insulated Van
Never underestimate the power of good air circulation in your insulated van. While materials like bubble wrap can add an extra layer of insulation, they shouldn’t impede airflow.
A well-planned ventilation system ensures that your van doesn’t become stuffy or damp, which can lead to mold growth and an uncomfortable living environment.
Whether you’re parked on a snowy mountain or by a sun-drenched beach, a reliable air circulation system will help regulate the temperature and keep you comfortable.
This is particularly true when you insulate a campervan, as the smaller space can quickly become unbearable without proper ventilation. Always prioritize a balance between sealing in warmth and allowing fresh air to circulate.
Insulation Strategies for Varied Climates
Van life takes you through a range of climates, each requiring different insulation strategies. In colder regions, maximizing the R-value to retain heat is crucial, while in hotter areas, reflecting sunlight and promoting airflow becomes more important.
It’s essential to adapt your insulation approach based on where your adventures lead you. Using materials that cater to these varied conditions will provide comfort and efficiency throughout your travels.
Whether you’re facing the biting chill of winter or the intense heat of summer, selecting the right combination of insulation and ventilation will ensure your van is equipped to handle the extremes.
From dense wool batts to reflective surfaces, each material plays a role in creating a van that’s ready for any weather you encounter on the road.
Battling Extreme Cold: Maximizing R-Value and Minimizing Thermal Bridging
In the fight against extreme cold, two main factors are critical: maximizing R-value and minimizing thermal bridging. To achieve this, start with a base layer of XPS foam board in between the ribs of your van, followed by a thin layer covering the ribs.
This method not only increases the R-value but also addresses the reflective surface needed to prevent heat from escaping through the metal ribs of your van. Thermal bridging occurs when heat passes through the less insulated parts of the van, such as the ribs and frame.
By adding a continuous layer of insulation over these areas, you reduce the chances of heat escaping, keeping the interior warm and toasty. A combination of materials, including foam board and wool, can be particularly effective in creating a barrier against the cold.
Surviving Extreme Heat: Emphasizing Reflective Materials and Active Ventilation
To combat the sweltering heat, focus on insulation that can reflect radiant heat and a ventilation system that promotes airflow. Reflective materials like Reflectix work best when used in conjunction with a vent fan that facilitates temperature control.
The fan will help circulate air, drawing out the hot air and allowing cooler breezes to enter. Active ventilation is particularly important if you’re spending time in hot climates where the insulation might trap heat inside during the day.
A vent fan not only provides a refreshing airflow but also assists in maintaining a comfortable temperature inside your van. Combine this with the strategic placement of reflective materials, and your van can become a cool oasis even during the hottest days.
Complementary Insulation Considerations
Insulation doesn’t just stop at thermal regulation; it also encompasses sound deadening, moisture control, and improving air quality. Materials like Havelock wool offer a multifaceted approach to van insulation.
This allows it to not only provide excellent thermal properties but also dampen road noise and managing interior humidity levels. These additional benefits create a more pleasant and sustainable living space.
Sound Deadening: A Quieter Ride
When you’re cruising down the highway in your van, the last thing you want is the constant drone of road noise. Sound deadening is crucial for a peaceful ride.
Products like Noico not only dampen vibrations on your van’s metal panels but also significantly reduce the intrusion of exterior sounds. This means you can enjoy your favorite tunes or the quiet hum of the road without the loud interruptions from outside.
The metal floor of your van acts as a conductor for noise, so covering it with sound-deadening material can make a big difference. Pairing these materials with low-e insulation can further enhance comfort, making your van a quiet, serene space for all your adventures.
Thermal Bridging: Identifying and Minimizing Weak Points
Thermal bridging occurs when materials that are poor insulators come in direct contact, allowing heat to bypass the insulation. In a van, this often happens through the metal ribs running along the walls and ceiling.
To combat this, start by inserting an XPS foam board between the ribs of your van. This creates a continuous layer of high R-value insulation, crucial for retaining heat in extremely cold climates. Next, add a thin layer of another insulating material over the ribs to cover any potential thermal bridges.
This could be a reflective surface material, which not only adds insulation but also reflects heat into the van. Remember, every layer counts when you’re trying to keep the cold out and the warmth in!
The Debate: To Use or Not Use a Vapor Barrier?
In the van life community, opinions about using a vapor barrier are mixed. Some argue it’s essential for protecting the van body from the moisture produced by breathing and cooking inside the van.
Others believe it traps moist air, leading to potential problems. If you’re using fiberglass insulation, it’s important to seal it off meticulously to avoid exposure to irritating fibers.
A plastic sheet can act as a plastic vapor barrier, separating the moist air from the van body and insulation. But be mindful, that this approach requires excellent ventilation to prevent condensation. A good fan can help control moisture, ensuring that your van remains a safe and comfortable home on wheels.
When a Vapor Barrier is Necessary in a Van Build
If you’ve chosen fiberglass insulation, a plastic vapor barrier becomes necessary. The barrier prevents moisture from reaching the insulation and the van body, which could lead to mold and rust. It also helps contain any loose fibers, protecting you from potential health hazards.
Make sure to install the vapor barrier correctly, sealing all edges to prevent moisture from bypassing it. It’s a vital step in protecting your investment and ensuring the longevity of your van’s interior.
Estimating Costs and Budgeting for Your Insulation Project
When it comes to insulating your van, costs can vary widely. Spray foam insulation is a popular choice for its airtight seal, but prices will fluctuate based on the thickness required and whether you bring your sprinter van to a professional or attempt it yourself.
Starting around $1950 for a professional job with two inches of closed-cell spray foam, costs ascend as more material is added.
It’s crucial to calculate the square footage of your van’s interior and determine how much insulation you’ll need. Consider the long-term benefits of better insulation against the initial cost. Remember, a well-insulated van means reduced energy costs in the long run, making it a worthwhile investment.
Tools and Materials Checklist for Van Insulation
Before starting your van insulation project, make sure you have all the necessary tools and materials. You’ll need a utility knife for cutting insulation to size, duct tape for sealing seams, and a gap filler for those hard-to-reach spots. These are just a few of the essentials for a successful insulation job.
Also, prepare for unexpected challenges by having extra materials on hand. Sometimes, a van’s nooks and crannies can require more insulation than anticipated. A thorough checklist ensures you won’t have to pause your project for a hardware store run.
Sealing It All In – Your Guide to a Well-Insulated Van
After choosing the right insulation method and meticulously installing it, it’s crucial to address the finishing touches that will lock in your cozy interior.
Making sure that you’ve properly installed thermal breaks will prevent heat loss through the metal of the van, which is a common oversight in van conversions.
These breaks act as a buffer between the interior and the exterior, ensuring that the chill from the metal doesn’t make your toes cold on frosty mornings.