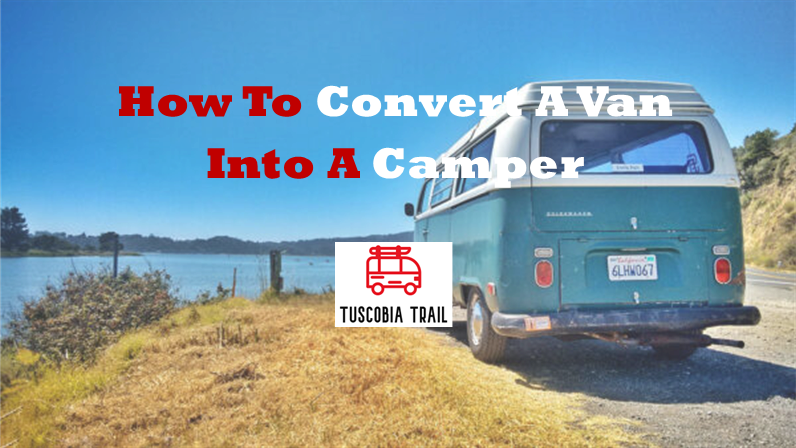
Embarking on the journey to convert a van into a camper is like opening a door to endless adventure and freedom. Here a step-by-step guide to our process.
Imagine cruising down the open road, your cozy home-on-wheels trailing behind, ready to welcome you after a day of exploring.
As we discovered, constructing our first camper from a simple van was not just a project, but a labor of love and creativity.
From selecting the perfect kitchen sink to fit our compact space to choosing the best van insulation for warmth during chilly nights, each decision brought us closer to our dream of van life.
Converting your van comes with its trials – there’s no denying it. But when you finally hit the road, every minute spent planning, building, and perfecting your mobile abode pays off.
The sense of accomplishment is palpable, not just in the physical structure around you, but in the life-changing experiences that lie ahead.
So, if you’re ready to roll up your sleeves and create a haven of your own, follow along for an adventure in DIY that just might change the way you see the world.
We’re here to guide you through each step, sharing our insights and encouraging you to infuse your personality into every corner of your new camper van.
Preparing for Your DIY Campervan Conversion Journey
Before diving into your campervan conversion, it’s critical to consider the essentials. Scouring platforms like Facebook Marketplace could lead you to your ideal passenger van, but remember, patience is key.
Keep an eye out for the right model that fits your vision of van life, whether that’s a spacious cargo carrier or a discreet passenger van. Reach out to your network and broaden your search radius; sometimes the best deals are a drive away.
Sourcing Your Ideal Van for the Conversion
Your van isn’t just a vehicle; it’s the cornerstone of your new home. Choosing the right one is pivotal to your van life experience.
There’s no universal answer to which van is the best, as it largely depends on your personal needs and preferences. Some vans offer more space, while others excel in stealth or affordability.
Keep in mind that while you might be tempted to build out your van from scratch, there are also pre-converted options available, saving you time and potentially some hassle.
Whether you have your heart set on a DIY project or prefer a ready-made solution, select a van that aligns with your lifestyle and van life aspirations.
Volkswagen Transporter vs Ford Transit: Comparing Popular Models
When it comes to selecting a van for your camper conversion, two standout options often come to mind: the Volkswagen Transporter and the Ford Transit. Each has its loyal followers and distinct advantages.
The Volkswagen Transporter, with its iconic design and reliable performance, has been a staple in the van life community for years. It’s known for its durability and the sense of nostalgia it evokes.
The Ford Transit offers a more modern look, and ample interior space, and is praised for its versatility and customization options. The choice between these models ultimately boils down to personal preference and the specific requirements of your conversion project.
Consider how each model complements your lifestyle. The Volkswagen Transporter might suit those seeking a classic aesthetic and compact efficiency, while the Ford Transit could be the go-to for those needing more room to build their dream mobile home.
Each model offers a reliable foundation for your van conversion, so take your time to research and test-drive to find your perfect match.
The Initial Stages of DIY Camper Van Conversion
As you embark on your campervan conversion, the first steps set the foundation for the entire project.
From finding the ideal passenger van to planning the layout, each decision paves the way for a successful transformation – including giving your van a name!
Take the time to research, envision, and meticulously prepare for the journey ahead. It’s in these initial stages that you begin to see your dream take shape, leading you to the thrilling process of stripping, cleaning, and customizing your new home on wheels.
Step 1: Stripping and Deep Cleaning Your Van
When you purchase a van, especially a pre-loved one, it’s likely to come with remnants of its past life. Begin your conversion by stripping out any unnecessary fixtures. If you’re in the UK and find a campervan with a wheelchair lift, consider the resale value of such items.
By selling what you don’t need, like a bench seat or specialized equipment, you can recoup some costs and create a clean slate for your conversion. Then, deep clean every nook and cranny to ensure a fresh start for your new living space.
Once the van is emptied, the real work begins. Scrub away years of use to unveil the potential beneath and also discover if you are going to need to paint your van.
This blank canvas is where your creativity will flourish, where you’ll install insulation, lay flooring, and build the interior that will become your haven on the road.
Step 2: Measuring and Planning the Layout
With a clean and empty van, it’s time to measure twice and cut once. Planning the van’s layout is one of the most exciting parts of converting your van. Envision where each element will go, from the fixed bed to the kitchen area with its propane stove.
Think about how you’ll use the space; perhaps a swivel chair to take in the view or a fold-out table for meals. And consider the power needs – a solar generator and portable solar panel can provide energy without the need for hookups.
As you map out your layout, factor in the essentials like a comfortable bed, a place to cook, and storage for your gear.
Whether you’re building a Peugeot Boxer into a camper van or RV, or looking for portable power stations to keep your devices charged, the layout is the blueprint for your van life.
So, take your time, ponder over the placement of each component, and imagine your life unfolding in this compact, movable home.
Step 3: Selecting and Installing Insulation
Choosing the right insulation is crucial for maintaining a comfortable temperature inside your camper. Insulation not only helps keep the heat in during colder months but also ensures your van stays cool in the summer.
Reflect on the climate you’ll be traveling in and select insulation that offers both thermal retention and moisture resistance.
Proper installation is key to avoid energy loss through the van walls, so take the time to fit it snugly in place for an airtight seal. This step is foundational in creating a living space that is cozy, efficient, and ready for all seasons.
Tips on Sound Deadening and Thermal Barriers
Sound deadening is often an overlooked aspect of campervan conversions, yet it plays a critical role in your comfort on the road.
By applying sound-deadening material beneath the insulation, you minimize the vibrations and noise from the panels of the van, ensuring a more peaceful driving experience.
Think of it as a silent guardian against the rattles and hums of travel. And while you’re at it, consider thermal barriers as well.
These barriers further enhance the van’s ability to maintain a stable temperature, making your home on wheels a sanctuary no matter where you park.
Whether you’re cruising along coastal highways or navigating mountain passes, a well-insulated and quiet van can make all the difference.
So invest in good quality sound deadening and thermal insulation materials. They’ll not only improve your overall van life experience but also contribute to the longevity of your camper.
Building the Foundations of Your Campervan
With the initial stages complete, it’s time to build the foundations of your campervan. This involves more than just constructing walls and floors; it’s about creating a space that reflects your personality and caters to your van life needs. As you plan the van layout, consider how you’ll use the space to live, work, and play.
Step 4: Designing a Functional Floor Plan
When it comes to a DIY van build, the floor plan is your strategic guide. Consider the elements that will make life on the road comfortable and convenient.
A fixed bed may be a simple solution for nights under the stars, but a convertible bed-seating area can maximize space during the day.
Think about the flow of the interior and how to best utilize every inch. A well-thought-out van layout not only optimizes space but also enhances your living experience, making each moment in your converted van more enjoyable.
The beauty of converting your van is the freedom to tailor it to your needs. As you sketch out the floor plan, remember to leave room for growth and flexibility.
After all, your needs may evolve as you delve deeper into van life, and a functional floor plan will adapt right along with you.
Step 5: Cutting and Installing Windows and Ventilation
Cutting a hole in your van walls for windows and ventilation is a transformative step. It invites natural light into your living space and provides essential airflow. Accurate measurements and careful planning ensure that you maintain the structural integrity of your panel van while enhancing its livability.
When cutting holes for windows, precision is key – there’s no room for error. Likewise, adequate ventilation is vital for managing condensation and maintaining air quality, especially when cooking or sleeping inside your camper.
Whether you’re installing a sleek skylight or a discreet air vent, these features will make your van feel more spacious and comfortable.
As you wield the tools to create these openings, you’re not just modifying a vehicle; you’re crafting a space that breathes, shines, and feels like home.
Step 6: Selecting and Laying the Flooring
Choosing the right flooring is a pivotal step in converting your van. It’s not just about looks; it’s about creating a foundation that stands up to the rigors of van life.
Whether you’re drawn to the warmth of wood or the practicality of vinyl, your flooring should handle the comings and goings of daily life while contributing to the overall aesthetic.
As you live in a van, you’ll appreciate a surface that’s easy to clean and maintain, allowing you more time to bask in the natural light and boundless landscapes that await outside your door.
Constructing the Core Elements
Building the core elements of your campervan starts with constructing a solid framework for your bed frames and seating. This stage is critical, as these structures will define the living space and must be both sturdy and functional.
Incorporating a fixed bed with storage space underneath ensures you’ll have plenty of room for all your camping gear while living in the van.
For those who choose a Ford Transit or similar model, the space can be optimized for a comfortable and efficient interior layout, perfect for hitting the road.
Step 7: Crafting Bed Frames and Seating
Creating a comfortable living space is key when converting your van. Integrating a fixed bed provides a dedicated sleeping area, especially beneficial for those who are living in the van full-time.
The space underneath the bed becomes vital storage space, perfect for stowing away camping gear. If space is limited, consider a convertible design that serves dual purposes without sacrificing comfort or functionality.
Step 8: Building a Compact and Efficient Kitchen
An efficient kitchen is central to your van’s design. When building your kitchenette, consider using masking tape to outline the placement of appliances and storage on your van’s floor and walls.
This will help you visualize the layout and maximize the use of space. With careful planning, you can include all the essentials like a sink, stove, and prep area in a compact design.
Step 9: Installing Electrical and Gas Systems
For those who envision staying at campsites or off the grid, installing electrical and solar power systems is essential.
A comprehensive guide to van electrics will help you understand the intricacies of wiring, battery management, and solar panel installation.
Remember, safety is paramount; it’s recommended to seek professional help for gas installations to ensure compliance with standards and regulations.
Adding Functionality to Your Van into a Campervan Conversion
Adding functionality to your camper goes beyond the basics. Installing a kitchen sink that’s both practical and space-efficient is a must.
Think about the size and depth that will work best for your day-to-day needs, and consider a sink with a cover that can double as additional counter space when not in use.
Step 10: Plumbing and Water System Essentials
When it comes to plumbing, a dependable water system is essential for van life. For a functional setup, include a sizeable water tank for freshwater storage and ensure your system is properly insulated to prevent freezing.
Campervan electrics play a crucial role in managing your water pump and monitoring tank levels, so integrate these systems with care.
As you plan your water system, consider the layout of your van and where appliances will be placed. This will inform the routing of your water lines and the placement of your sink and shower. Always prioritize access for maintenance and potential upgrades as your needs evolve on the road.
Step 11: Creating Custom Storage Solutions
Custom storage solutions are the key to a clutter-free and organized van. Utilize every inch of space by incorporating built-in cabinets and adjustable shelving.
A vapor barrier is crucial to protect your belongings from moisture, while wooden battens and adhesive glue can be used to secure insulation, ensuring you stay warm in cold climates.
While it might seem an expensive endeavor, creating effective storage doesn’t have to break the bank. With some creativity and DIY skills, you can repurpose materials and design solutions that are tailored to your specific needs.
Whether it’s hanging gear, tucking away clothes, or stowing kitchen supplies, there’s a storage hack for every challenge.
Step 12: Insuring Your Campervan Properly
Insuring your campervan properly is a critical step in your DIY van build. Consider a fixed bed design, which could impact your insurance options due to permanent modifications.
Additionally, installing safety features like a propane stove with proper ventilation may result in better coverage terms. Always check with insurance providers to ensure your build meets their requirements.
Personalizing Your Campervan Space
Van life is about creating a space that reflects your personality and travel style. Personalizing your campervan can range from selecting cozy fabrics for your upholstery to choosing the right color palette for your interior. It’s these unique touches that turn a van into a comfortable, inviting home on wheels.
Step 13: Upholstery and Interior Design for Comfort
When converting a campervan, the upholstery and interior design are what truly make it feel like home. Select materials that are not only stylish but also durable and easy to clean. Cushions and curtains in your favorite colors and patterns can add warmth and personality to your space.
Think about the functionality of your fabrics. Are they suitable for pets or outdoor gear? Do they provide enough insulation?
Your choices should align with your lifestyle. With a thoughtful approach to interior design, your campervan will be a cozy retreat after a day of adventure.
Step 14: Adding Privacy with DIY Curtains and Shades
While basking in natural light can be delightful during the day, living in a van means you’ll need privacy come evening. Making your curtains isn’t just cost-effective, it’s a fun DIY project. Start by choosing a fabric that complements your interior and provides enough opacity for privacy.
You can opt for no-sew options using hemming tape if you’re not confident with a sewing machine. Measure your windows, add a few extra inches for a full look, and you’re on your way to creating a cozy, private space.
Remember, curtains also serve to block out light for a restful night’s sleep. For a more polished look, consider adding shades that can roll up during the day.
This dual system allows you to control the amount of light and privacy at any time. With a bit of time and creativity, your van will soon feel like a secure and serene retreat.
Step 15: Final Touches to Make It Feel Like Home
Adding those final touches is what truly turns a van into your home on wheels. On a shoestring budget, thrift stores are treasure troves for unique finds.
Imagine draping a set of $1 pillows across your nook, hanging a $1 mirror that reflects space and light, or setting down seat cushions that add comfort and color. And for that sprinkle of magic, string up some $5 battery-operated fairy lights to give your space a whimsical glow.
Cute and Practical Mason Jar Storage Ideas
Mason jars aren’t just for canning – they’re fantastic for storage in a compact van. In just 20 minutes, you can mount them under shelves using hose clamps for a secure hold.
Fill them with spices, tea bags, or daily essentials. This not only saves space but adds a homey, rustic touch to your kitchen area. Plus, seeing your items at a glance makes it easier to grab what you need without rummaging through cupboards.
For a more decorative approach, paint the jars to match your interior or fill them with string lights for a cozy ambiance. The beauty of this storage solution is its simplicity and versatility.
Whether you’re storing utensils or planting herbs, mason jars provide a charming and functional element to your campervan’s decor.
Making Your Campervan Road-Ready
Before you hit the open road, ensure that your campervan is equipped for the journey ahead. This means checking the basics like tire pressure, and oil levels, and making sure all your DIY additions are securely in place.
It also involves organizing your space for easy access to necessities and securing loose items to prevent shifting while driving.
Once your campervan is road-ready, you can embark on your adventure with confidence and peace of mind, knowing that your home is safe and sound.
Step 16: Essential Campervan Accessories for Your Adventures
No campervan is complete without the right accessories to enhance your adventure. Essentials like a durable enamelware pot set, a cast-iron skillet, and sturdy cutlery will make meal prep a breeze. Don’t forget camping plates, bowls, and a cutting board tailored for the nomadic life.
For keeping food chilled, a large cooler is a must – though if you’re willing to splurge, a Yeti cooler offers superior insulation. For outdoor relaxation, bring along a pair of camping chairs. To ensure you always have the right tools on hand, pack a basic toolkit, including a spatula and propane for your stove.
These accessories not only make your van life more enjoyable but also prepare you for the spontaneous moments that make for the best stories.
Step 17: Organizing and Maximizing Space Efficiency
Once you’ve crafted the perfect bed frame, it’s time to focus on creative storage solutions. Smart organization is the key to a comfortable and uncluttered van life. Use every nook and cranny to your advantage, installing shelves, hooks, and hidden compartments.
Consider multifunctional furniture that doubles as storage, and use vertical space to keep your living area open and airy. For clothing, roll instead of fold to maximize drawer space, and use vacuum-sealed bags for seasonal items.
Kitchen essentials can be neatly organized with magnetic strips for knives and stackable containers for dry goods. By staying organized, you ensure that every inch of your campervan is utilized, making for a more enjoyable and stress-free living experience.
Step 18: Ensuring Your Campervan Meets Legal Requirements
Embarking on a DIY van build comes with the responsibility to ensure that your camper meets all legal standards.
This includes not only safety features like smoke detectors and fire extinguishers but also proper installation of a propane stove and ventilation systems.
Compliance with weight limits, vehicle registration, and campervan insurance requirements is also essential. Before you set off on your travels, double-check that your campervan adheres to these regulations for a worry-free journey.
Reclassifying Your Van and Understanding Weight Limits
Reclassifying your van as a motorhome may require submitting documentation to your local vehicle authority. This process ensures that your campervan is recognized legally for insurance and registration purposes.
It’s important to understand weight limits for your specific vehicle to maintain safety and avoid penalties. Overloading your campervan can lead to decreased performance and increased wear and tear, which can compromise your travel plans and safety.
Keep a detailed log of the items you’ve added during your conversion, and consult your vehicle’s manual for maximum weight capacity.
When in doubt, a visit to a weigh station can provide you with an accurate assessment. Staying within the recommended limits is crucial for the longevity of your campervan and for keeping you safe on the road.
How Much Does a Full Campervan Conversion Cost?
The cost of a full campervan conversion varies widely depending on the level of customization and the quality of materials used. Essentials like insulation, flooring, and campervan accessories can quickly add up.
You may also need to factor in the cost of a reliable power system and any specialized gear tailored to your lifestyle.
Creating a detailed budget and tracking expenses throughout the process can help manage costs and prevent overspending. Remember to allocate funds for unexpected expenses, as they’re common in any DIY project.
By carefully planning and researching your options, you can create a personalized campervan that fits both your needs and your budget.
Daily and Long-Term Maintenance Considerations
Living the van life means being prepared for both daily upkeep and long-term maintenance. On a day-to-day basis, this includes cleaning, organizing, and checking your campervan systems to ensure everything is functioning properly.
Long-term, you’ll want to schedule regular maintenance checks for your vehicle’s engine and living space components to prevent larger issues from arising.
Keep a record of maintenance tasks and set reminders for critical checks, such as oil changes, brake inspections, and tire rotations. By staying on top of these tasks, you protect your investment and ensure a safe, comfortable journey wherever the road may take you.
A Comprehensive Conclusion to Your Campervan Odyssey
Reflecting on the process of transforming a van into a campervan, we’ve covered everything from the initial purchase to adding the final touches that make it feel like home.
We’ve delved into budgeting, planning, and execution, equipping you with the knowledge to embark on your odyssey. Your dream camper awaits, ready for the countless stories you’ll gather on the open road.